Showing posts with label Jesus. Show all posts

How to Make "Jesus Loves Me" Shirts with Kids {and a linky!}

Back in the Spring, I made these "Jesus {hearts} me" shirts with my whole preschool class, and they were a huge hit! The kids were so proud of them because they actually painted every part of the shirt even though they were only 2 or 3 years old. These shirts would be great to make at Sunday School, or even as a Vacation Bible School Shirt! Also, today is First Friday, so that means I'm hosting our First Friday link up! If you have a blog post (or several) you'd like to share with all of us this month, please scroll to the bottom of this post. :-)


Materials Needed to Craft Jesus Loves Me Shirts:

  • White T-Shirts (I found ours at the Dollar Tree)
  • Acrylic Paints (Don't waste your money on fabric paint- it won't matter)
  • Letter Stencils (I actually substituted foam letter stickers for stencils because I couldn't find any actual stencils in the right size)
  • Foam brushes or stencil brushes
  • Cardboard (for inside the shirts)
Prep Work: Glue your stencils together in the words "Jesus" and another that says "me". Again, I used foam letter stickers instead. I did this by cutting a square around each sticker and removing the middle like this:


Also, put a piece of cardboard inside each shirt. This keeps the paint from bleeding through to the other side of the shirt, and also makes a nice, flat work area out of the front of the shirt. 

I then glued a poster board "shield" around them because the kids I was working with were very small, and I wanted them to have a bigger target to work with. 

 Back of Stencil

Front of Stencil on Shirt

I have a few classroom assistants, so I had one of them go around allowing the kids to stencil Jesus, another go around having them stencil "me", and I went around stamping their hand-prints into heart shapes. 


We used 3 different colors of acrylic paints in class, but if you have older kids you could actually stencil each letter a different color. Also, upside down hand-prints make a nicer heart shape, but you do what you can with little kids. ;-)


We ended up having a little trouble with our "Me" stencil, so I quickly went back over the letters with one of the foam brushes in a darker color. 


That's it! Let them dry and wash as normal. Acrylic paint is not going to wash out of clothes, so it's perfect for this project. Your only motivation for buying fabric paint is that it might dry a little softer than stiff acrylic paint, but even that totally depends on the brand you get. 


My entire class wore their shirts to the end of the year ceremony, and they were adorable! Can you guess which song we performed for the group? ;-) When my 2/3 year olds sing Jesus Loves Me, I have them point to themselves each time they say "Me" in the song, and this is a big hit! 


Again, I think these would be an absolutely great craft to make for VBS! Then the kids could wear them all week! :-)

Ok, now it's your turn to share your links! Feel free to share any blog post that you think would interest Catholic mothers or those working with children. Also, feel free to share more than one, and don't forget about your archives! I love to see the things you all link up! Just link back here so others know where to join in on the fun. :-)

First Friday Link Up


If you enjoyed this post, get free updates by email or RSS. Photobucket

Ascension of Jesus Crafts for Kids

Ascension Thursday is coming up fast! Last year, I posted cute food ideas for celebrating the ascension. My suggestion for this year? Use a craft as a learning tool for teaching your kids what the ascension is all about! Luckily I have several crafts on display for you to choose from:

Exhibit A: Adorable Ascension craft from Oriental Trading!

Ok, how cute is this ascension craft? You pull the string, and Jesus disappears into the blue paper cup "sky". What a great idea! Ya, you could order the kits from Oriental Trading company... if I had posted this in enough time for you to do so. Ahem. BUT, I'm quite sure that Catholic Icing readers are crafty enough to figure out how to buy their own blue paper cups and cotton balls. I think you could use my printable Risen Jesus for this craft as long as you got big cups (like the plastic solo cups, which totally come in blue).

Exhibit B: Easy Ascension Thursday Centerpiece

In last year's Ascension post, I featured an adorable centerpiece idea. This year I'm planning a simpler verions of it myself. I'm going to fill a wine glass with cotton ball "clouds" and turn it upside down, setting the Risen Jesus from my Printable Resurrection set on top. Ta-da- Ascending Jesus!

Exhibit C: An Ascension Craft from 10 Kids and a Dog.

Not only does this look like a fun craft, but it certainly makes for a striking visual when it's all strung up above your dinner table! Find directions for making this ascension craft here.

If you're looking for a simpler way to celebrate Ascension Thursday with your family this year, try printing a beautiful Ascension coloring page from St. John's for free!

Also, be sure to check out the Catholic Toolbox for lesson plans with tons of ideas and links for the Ascension of Jesus! (Have I ever told ya'll how much I love The Catholic Toolbox? Well, let me tell ya- I LOVE The Catholic Toolbox!) 

I had a rockin' idea for an ascension craft, but our stomach bug has really slowed me down around here. Oh, well- maybe next year! Happy (almost) Ascension Thursday!


If you enjoyed this post, get free updates by email or RSS. Photobucket

Toss Your Nets to the Other Side {Teaching tools for kids}

So we're still learning about tossing our nets to the other side. Here's a craft that goes with the bible story.


This craft is mostly pre-cut-out fun foam stickers on foam board. The little "net" (which is a piece of touile used to wrap wedding favors) sticks on with velcro and is removable. The little fishermen are also removable, and just stick into the slit in the boat. You gotta love interactive crafts! ;-)

Also, here's a great song that you can use to tech your children about the toss your nets to the other side bible story!
Toss Your Nets to the Other Side Song for Kids
(To the tune of 10 Little Indians)

Peter James and John in a sailboat,
Couldn't catch any fish!

Jesus appeared on the beach,
and told the apostles this:

"Cast your nets to the other side"
so the apostles did.

Now their nets were full of fish,
and they recognized the Lord!

This would be a great song for at home, for a CCD class, or a Sunday school class to teach this bible story to kids. My kids love it!

Remember the toss-your-nets snack that we made earlier this week with goldfish crackers? {You can find the directions here}


My kids also love this apostles play set! It's a great toy to go along with this bible story, and I like to keep ours in the "church toy bag". You can order your own Galilee Boat with Apostles Play Set here.

Galilee Boat with Apostles Play Set


If you enjoyed this post, get free updates by email or RSS. Photobucket

Toss Your Nets to the Other Side {Snack Idea}

We've still been focusing on the Stations of the Resurrection (14 things that happened from the resurrection to Pentecost). Station number 10 is: Jesus Appears by the Sea of Tiberias (John 21:1-14). Are you familiar with this story? In Jesus' 3rd appearance after His death, the some of the apostles have been fishing, but they can't catch any fish. Jesus tells them to toss their nets to the other side of the boat, and their nets are so full of fish they can't even pull them in! That's when they recognize Him as the Lord!

Inspired by Tiffany's snack, we made our own "Toss your nets to the other side" treat. :-)


These are very yummy- the perfect mix between salty and sweet!
See our "nets"? :-)

Ingredients Needed:
  • Snyders window pane pretzels
  • Hershey's Kisses
  • Goldfish Crackers


How to Make Hershey Kiss Pretzels:
  • Preheat oven to 350
  • Place Pretzels on a cookie sheet
  • Place one unwrapped kiss on each pretzel
  • Place in oven for 1-2 minutes until kisses look shiny
  • Remove from oven and press on goldfish crackers
  • Place in refrigerator to speed the cooling process


The most time consuming part of this is unwrapping the kisses, which is actually a great job for little hands. (This still requires supervision unless you want it to become a job for little mouths as well).


When I took a picture of these Hershey Kiss wrappers, Lydia said "Mommy, you're taking a picture of garbage!". She's only 5. I didn't think she was going to figure out I was a weirdo until she was a teenager. 

Classroom Variation
If you'd like to do this as an activity snack for vacation bible school or Sunday school, try this. Give the kids some pretzels, goldfish crackers, and blue icing. Then let them "catch" their own fish while you tell them the story. No oven required. :-)


When Family at the Foot of the Cross made a similar snack, they actually counted out 153 goldfish crackers because that's how many fish the apostles caught. Sounds like a fun counting activity to me, and a great way to learn a bible story!


So I have this obsession with buying unique dishes at thrift stores, and I bought this blue plate for $1 because it read very "Starry Night" to me, and I'm a total van Gogh freak. Isn't it the perfect plate for this cute goldfish snack?!


... and my husband thought I didn't 'need' this plate. ;-)


If you enjoyed this post, get free updates by email or RSS. Photobucket

Printable Easter Countdown Calendar

Did you know that there are 50 days in the Easter season? Not one, but 50! That's even more days than there are in lent! The Easter season begins with Easter Sunday, and ends with Pentecost. In order to help my kids and I remember that the Easter season is an ongoing thing, I made this religious Easter countdown calendar which starts on Easter Sunday, and ends on Pentecost Sunday.
 
The best part about this Easter countdown calendar is that it's printable, and free for all of you!


Make sure you allow the image to download completely before printing, otherwise it may result in a half printing job. I'm sorry, but I cannot troubleshoot your printer problems with you- thank you for understanding. If you're having trouble printing, try downloading them first rather than printing straight from the doc.

This Easter calendar doesn't include calendar dates, so it's good for every year! Some days I included when drawing this calendar are Divine Mercy Sunday (which Pope John Paul II instituted as the second Sunday of Easter), all 8 Sundays of Easter, Ascension Thursday, and Pentecost. This is a great tool for teaching your kids about the liturgical year, so I hope you find a use for it!

How to use this calendar:
I'm going to have my kids mark off each day with a sticker. (I think I have a bunch of small Easter stickers left over from an egg dying kit around here somewhere). Other options would be coloring one square each day, or marking them off with "x's". You could also laminate the calendar with contact paper, or put it in a Dollar Store frame and then mark off the days with a dry erase marker. I also though about decoupaging it to a cookie sheet, and moving a magnet one square each day. It's totally up to you.

I'm definitely using these as a religious Easter basket stuffer at my house, too! ;-)

Just for fun, I'm also offering the Easter calendar in color, and it's also free!


The colored Easter calendar is available on a brand new special page for those who are subscribers of Catholic Icing! If you've already made yourself a friend of Catholic Icing by subscribing, just look to the bottom of this post in your reader or email, and you'll find a link to the "Subscriber Bonus Page". If you'd like to print the colored Easter calendar for free, but are not yet a subscriber, no problem! Subscribe here, or by entering your email address into the box below. After entering your email address, an email will be rushed to your inbox with access to the Subscriber bonus page!

Enter your email address:


If you're looking for a countdown calendar that ends on Easter, you need to check out my printable Lenten calendar

If you're looking for more ideas on how to celebrate all 50 days of Easter, check out this post

These pages are my own artwork and are free for any not-for-profit use by individuals, families, or educational organizations. Copies may not be sold, reproduced for profit, or published by anyone but me. If you'd like to post this calendar for others to find, I would ask that you link to my post and rather than my individual downloads because their location may change. When printing or running copies, please do not remove my website from the bottom of the page. Thanks!
If you enjoyed this post, get free updates by email or RSS. Photobucket

How to Make Resurrection Rolls, aka "Empty Tomb" Rolls

Looking for a fun way to teach your kids about the true meaning of Easter this year? Making resurrection rolls is super easy, and they're really yummy! I'm going to give you the recipe for resurrection rolls, and step by step directions on how to use them to teach your kids about the Easter story!


Ingredients Needed to make Resurrection Rolls:
  • *Canned Crescent Rolls
  • Small bowl of melted butter
  • Small bowl of Cinnamon/Sugar Mixture
  • Large Marshmallows
*I've had a lot of emails asking about "canned crescent rolls" from other countries, and also people who just prefer home-made, so you can find a recipe for resurrection rolls here that makes them totally from scratch! "From scratch" really isn't my thing, but it might be for you! ;-)

These are something you make with your child, because they're a fun Easter lesson activity. Before beginning, melt your butter, preheat your oven to the temperature on your crescent roll can, and cover your pan in parchment paper or aluminum foil, because the melted marshmallows can get messy!


Give each child a marshmallow, and tell them it represents Jesus. Have them dip it into the melted butter, and then roll it in the cinnamon sugar. These represent the oil and spices used to prepare Jesus' body for burial.


Now give each child a crescent roll, and have them wrap up the marshmallow tightly, pinching it closed as much as possible. The roll represents the linen cloths that Jesus' body was wrapped in.


Place your rolls into the oven, which symbolizes the tomb. Bake according to package directions, and pretend it has been 3 days! ;-)


While the resurrection rolls baked, the marshmallow melted away, leaving an "empty tomb". Isn't that cool?! Jesus has risen! Alleluia, Alleluia! :-)


These are super easy to put together! They are really yummy and sweet- very similar to cinnamon rolls. We like to eat them for breakfast on Easter morning. They also work well as a religious Easter snack for later in the day. Have fun teaching your kids the true meaning of Easter! God bless! :-)

If you enjoyed this post, get free updates by email or RSS. Photobucket

Christ the King Craft

Catholic ABC's Week: 16
Letter of the week: K
Theme: King (Jesus is King or Christ the King)
Saint of the Week: Blessed Kateri
Craft: Jesus is King


I knew I wanted to make "K" week about Jesus being king, but coming up with a craft was harder than I thought it would be! I wanted it to be a clearly religious king craft. There are already so many secular king crafts out there, so there's no need to waist my time re-creating the wheel, are you with me? Lol!

Materials Needed to Complete This Craft:
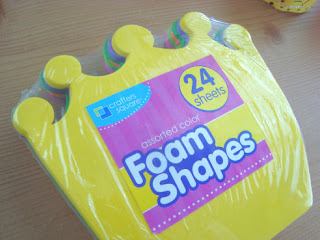
  • Fun Foam (or substitute construction paper or card stock)
  • Decorations for crown (Examples: glitter glue, stick on jewels, markers, stickers, etc. We used glitter glue)
  • Hot Glue (grown up use only)
  • Popsicle sticks
  • School Glue
  • Styrofoam Balls (or substitute pool noodles)
Start by cutting the foam or paper into a crown shape. You can cut a regular, flat crown shape, but if you curve the shape a little the crown will have a cuter shape when the craft is complete. Older kids should be able to do their own cutting.


Let the kids decorate the crowns however they like. I lightly drew a "K" on my daughter's crown and let her trace over it with glitter glue. She did a pretty good job! Mostly I let her free style it because she loves to be creative!


You need 2 popsicle sticks to make the cross. Shorten one of them with some scissors, and let the kids glue them together and decorate the crosses as well.


When your decorations dry, it's time to put it all together! Carefully saw a styrofoam ball in half with a sharp kitchen knife. Use your cool glue gun to attach the foam around the base of the ball. Then your kids can stick their cross in the middle of the crown!


If you're looking for a cheaper option, I found that a slice of pool noodle worked just as well as the styrofoam. The only difference is that you'll have to make a small slit with a sharp knife for inserting the cross- it won't work to just stick it straight in. You can get pool noodles for a dollar and get enough to make probably 75 of these, so the pool noodle option is infinitely cheaper. I can get sryrofoam balls at my Dollar Tree, but they are a pricey craft supply at special craft stores- up to several dollars each! Here's one we did with a pool noodle slice: 


FYI- you can also get packages of these for $1 at the Dollar Tree:

Thanks to everyone on Catholic Icing's facebook wall who bounced ideas with me about how to make these crosses stand up! You guys are a great crowd and I love talking to all of you!

Grab Bag Ideas for the Letter K: (be sure to check out the Classroom Scriptfor directions on using the grab bag.) Kitten, Koala bear, Kangaroo, Ketchup packet, Knot, King, Key. (Avoid anything starting with "Kn" that doesn't make the classic "K" sound. That's confusing for kids.)

For More Resources, check out the Catholic Toolbox lesson plans for the Letter K. (Her K lesson is on King Solomon.)

Catholic ABC's runs here at Catholic Icing every Wednesday with the new letter of the week. You can get the details of this program by checking out the Classroom Script.


I'm very pleased with the results of this craft, and Lydia (my 4 year old) absolutely loved it!


If you enjoyed this post, get free updates by email or RSS. Photobucket