Showing posts with label Immaculate Heart of Mary. Show all posts

Sacred and Immaculate Heart "Play Doh" Cookies

Don't let the name of these cookies scare you off- these are 100% edible cookies! They just look like play doh, and you get to play with them like you're a little kid again. And let me tell ya- your kids are gunna LOVE making these cookies!


The feast of the Sacred Heart of Jesus falls 19 days after Pentecost, which is this Friday. The Feast of the Immaculate Heart always falls on the day after the feast of the Sacred Heart (and is always on a Saturday). But the whole month of June is dedicated to the Sacred Heart, and the month of August is dedicated to the Immaculate Heart, so you have a big window to celebrate in! :-)

First you'll need to make your dough. In my opinion, this is the least fun part. If you're in a patient mood, allow your toddler to "help" you. ;-) Here are the ingredients. I went ahead and doubled the recipe for you to make it "big family friendly", which will make about 25 heart shaped play doh cookies.

How to Make Play Doh Cookies

Ingredients:
1 1/2 cups butter, softened
6 ounces cream cheese, softened
2 cups white sugar
2 eggs
2 teaspoons almond extract
5 1/2 cups all-purpose flour
2 teaspoons baking powder
1/2 teaspoon salt
For Decorating:
gel food coloring
white sugar

Start by creaming the butter, sugar, and cream cheese. Then add the eggs and almond extract. Stir until smooth. In a separate bowl mix dry ingredients, and add to the butter mixture. Color as desired and roll into 2 inch balls. Cover and refrigerate for 2+ hours. When firm, shape as desired (directions below for how to make Sacred and Immaculate Heart cookies). Preheat oven to 350. Sprinkle the top of each cookie with white sugar, and cook for 12-15 minutes or until cookies begin to brown on edges.

For the sacred heart cookies, I divided my dough in quarters. I made one quarter red, one quarter pink, split one quarter between yellow and orange, and split the last quarter to make purple and left the last eighth white.


Begin by sticking 2 colors together. For my Sacred Heart cookies I used red and orange, and for my Immaculate Heart cookies I used red and pink.


Roll this into a long coil. My dough did crack when I was doing this. You can stick it back together if it brakes. I found it was best to start in the middle and roll towards the edges. It also seemed to work better if we rolled using our finger tips rather than the entire palm of our hands.


Then roll the coil into a spiral circle.


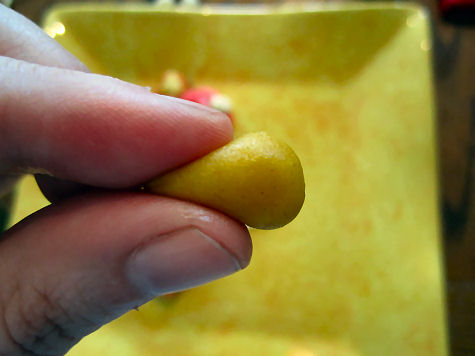
Use the end of a butter knife to dent a top in for the heart shape, and then pinch the bottom of the cookie to complete the heart.

Here are the pieces I used to put together Immaculate Heart Cookies.
(The Immaculate Heart of Mary has flames coming out of the
top and is surrounded by roses).


Here are the needed pieces for the Sacred Heart Cookies.
(The Sacred Heart of Jesus also has flames coming out
of the top, but it is surrounded by a crown of thorns).


You can shape the flames by making the dough into a ball, and then pinching the end to a point. Wrap an orange coil around the yellow shape to complete the flame.

 
I found that the crown of thorns and roses stuck just fine, but the flames will fall off after the cookies are baked if you don't stick them on really well.


Before you bake them, sprinkle the tops with sugar. This makes them a little sparkly, plus it makes them super yummy to eat. :-)


Here are the finished cookies! I think they would be
the perfect cookies for a Catholic bake sale!


And what isn't cuter on a stick? 

Lolipop cookies are just adorable!


Most Sacred Heart of Jesus, have mercy on us. Immaculate Heart of Mary, pray for us.


Related Posts:


If you enjoyed this post, get free updates by email or RSS. Photobucket

Religious St. Valentine's Day Ideas

I thought with St. Valentine's Day literally right around the corner, you guys would appreciate some crafty ideas!

I love this St. Valentine's Day wreath! It's 
(I like to call Tiffany the "Liturgical Wreath Lady". 
She never disappoints). :-)

I love this bible word search! You have to find the
words from Corinthians 13:4-8. So cute!

Busy With Blessings made an awesome
Beatitudes Valentine Project and the final
project made for a beautiful decoration!

Joyfilled Family shared some beautiful
Religious Love Printables with prayers!

Family at the Foot of the Cross also made these
Saintly Valentines for Jesus. :-)

That Artist Woman using toilet paper tubes.

If you enjoyed this post, get free updates by email or RSS. Photobucket

Immaculate Heart of Mary Shirts- The Flip Side!

Remember the Sacred and Immaculate heart shirts we made during June? Well, the month of June is dedicated to the Sacred Heart of Jesus. Know what the month of August is dedicated to? You guessed it- The Immaculate Heart of Mary! :-) If you've already made your shirts, I have an update. If you haven't, then you have another chance to do it!


When you tie dye the shirts, you get a heart on the front and an identical heart on the back. We just left the back of our shirts blank. See???


So we're updating our shirts. If they have a Sacred Heart on the front, we're adding an Immaculate Heart to the back. And Visa Versa.

I would love it if I had thought of this idea myself, but it actually came from Mary over at 3 Turkeys. So creative! Here are the back of their shirts:


Click to find complete directions on making the Sacred and Immaculate Heart Shirts.

And just for fun, here are me and my kids sporting our awesome shirts together!


Happy Catholic T-shirt making! This project is one of my favorites! :-)
If you enjoyed this post, get free updates by email or RSS. Photobucket

Sacred & Immaculate Heart Ideas for Kids

I posted some Sacred and Immaculate Heart Ideas earlier this week, but since then I've run across even more cool stuff! Don't feel like you have to "get it all in" by the Sacred Heart feast day tomorrow- The whole month of June is dedicated to the Sacred Heart of Jesus! :-)

Check out these Sacred Heart Cookies made by Sharon.
They're so cute! :-)

Over on Famila Catolica, find these really cool
Sacred Heart & Immaculate Heart sun catcher crafts!
I LOVE this site! It's in Spanish, but she has a translator 
on the top left of the screen :-)

Head over to Cherished Hearts at Home to find these cool
Sacred and Immaculate Heart crafts.

Most Sacred Heart of Jesus, have mercy on us!
Immaculate Heart of Mary, pray for us!

If you enjoyed this post, get free updates by email or RSS. Photobucket

Tie Dye Catholic Shirts- Sacred Heart, Immaculate Heart, & Divine Mercy

After finding these Tie Dyed Sacred Heart Shirts online, I just had to make some! We made a Sacred Heart shirt for my son, and Immaculate Heart shirts for me and the girls. Then my daughter insisted that "Daddy needs one", so I made a "Divine Mercy" shirt for him. (I didn't think my husband wanted to wear a shirt with a heart on it). For anyone who doesn't know, the feast of the Sacred Heart coming up on Friday :-)


Supplies Needed:
  • A Tie Dye Kit with desired colors. (I got the tulip kit with fuchsia, yellow, and turquoise. It cost $10, and will dye around 7 shirts if you dilute the blue or are willing to skip the blue on some of the shirts.)
  • White shirts (Or you can tie dye a sacred heart onto something else like a white bag or a pillow case. Think creatively!)
  • Black fabric marker or sharpie (for the Sacred Heart and Divine Mercy Shirts)
  • Fabric roses or rose stamp with white acrylic paint (for the Immaculate Heart Shirt)
How to tie dye a Sacred or Immaculate Heart:

Before starting, it might be helpful to watch this video on how to tie dye a heart. 


1. Start with a damp shirt and fold it in half as shown.

2. Sketch half of a heart onto the shirt with a pencil. Draw the "dip" in the top of the heart extra deep for a good final heart shape.


3. Gather the heart shape right on the pencil line- accordion style. Keep the pencil line as straight as possible. Start at the bottom corner of the heart and work your way around. This is what makes the heart shape, so do your best. As soon as you've gathered it all the way around the heart, rubber band it on the pencil line to secure it.


4. Place 2 more rubber bands down the shirt for color separation.


5. Prepare dye according to the directions, and dye the shirts making sure to get into the fabric crevices. Let the yellow overlap the red a little to let it bleed and create the orange "flames" around the heart. The colors go on in the order shown:


6. Finish your shirt according to the directions on your dye. (For mine, we put the shirts in plastic bags for 8 hours and then washed them in hot water).

7. Let the shirts dry.


When the shirt is dry...
    You can decorate it to be a "Sacred Heart" by drawing on a crown of thorns and a cross. I used a sharpie, but I suppose an actual fabric marker would also do the trick ;-) Either way, put a piece of paper under where you are working to prevent the marker from bleeding through to the back of the shirt.


    You can make an "Immaculate Heart" by decorating the heart with roses. I did this 2 different ways:

    1. Use a rose stamp to create the roses using white acrylic paint. I think acrylic paint is best because it dries so quickly, and lets face it- you've already had to wait for these shirts to dry once! This is a great way to go if you're making these shirts for a whole youth group or something. I found my rose stamp in the one dollar bins at Michael's.  
     

    2. Or, you can sew on little fabric roses. At Michael's, you can get 10 of them for $0.99! :-)


    About the Sacred and Immaculate Heart Images:

    Both hearts are surrounded by light and flames. The Sacred Heart of Jesus is depicted surrounded by a crown of thorns, and has a cross on top. The Immaculate Heart of Mary is surrounded by roses. Sometimes (like on the miraculous metal) it is also pierced with a sword. I was sure my girls would rather have just roses on their shirts ;-)


    How to Tie Dye a Divine Mercy Shirt 
    *a masculine alternative to a heart t-shirt ;-)

    1. Fold shirt in half down the middle.
    2. Mark a diagonal across the shirt with a pencil. In St. Faustina's vision, the rays were coming from Jesus' heart, so I tried to make the top of this line end at at "heart height".


    3. Gather the shirt on the pencil line accordian style, keeping the pencil line as straight as possible. When you've gathered it all the way across the shirt, rubber band it to hold it in place.


    4. Add 2 more rubber bands, one on each side of the original. (This will keep the best "V" shape).


    5. Dye the 2 rubber-banded sections with the red and blue dye. Then, dilute the blue dye and use for the remainder of the shirt. (For the diluted dye,  I added 3 parts water to 1 part prepared dye). Alternatively, you could leave the remainder of the shirt white, but I had too many accidental blue splatters on the shirt to make that possible for mine.


    6. Finish your shirt according to the directions on your dye. (For mine, we put the shirts in plastic bags for 8 hours and then washed them in hot water).

    7. When the shirt is dry, use a sharpie or fabric marker to write "Jesus I Trust in You" on the shirt. Put a piece of paper under where you are working to prevent the marker from bleeding through to the back of the shirt.

      About the Divine Mercy Image:

      Jesus appeared to St. Faustina, and asked her to have a painting made of this vision with the words "Jesus I Trust in You", so that's why I put it on the shirt. "The two rays denote Blood and Water. the pale ray stands for the Water which makes souls righteous. The red ray stands for the Blood which is the life of souls."- St. Faustina's diary. If you're crious, read more about the Divine Mercy Image.

      I think these shirts would be a fantastic for a youth group or vacation bible school project where matching shirts were needed. When I went to World Youth Day with my youth group, we wore matching shirts the whole time so we could keep up with our group. These certainly would have been fun!

      If you make any and put them up on your blog, please leave the link in the comments so we can all see them! :-)

      Here are my kiddos enjoying their shirts! 


          If you enjoyed this post, get free updates by email or RSS. Photobucket